# Nexus 运维
Nexus 是一个强大的 Maven 仓库管理器,可以用来搭建 Maven 私服。
关键词:maven, nexus
部署环境:
- Nexus 3.13.0
- JDK 1.8
- Maven 3.5.4
# 一、Nexus 安装
进入官方下载地址 (opens new window),选择合适版本下载。

本人将 Nexus 部署在 Linux 机器,所以选用的是 Unix 版本。
这里,如果想通过命令方式直接下载(比如用脚本安装),可以在官方历史发布版本页面 (opens new window)中找到合适版本,然后执行以下命令:
# 个人习惯将 nexus 安装在 /opt/maven 目录下
wget -O /opt/maven/nexus-unix.tar.gz http://download.sonatype.com/nexus/3/nexus-3.13.0-01-unix.tar.gz
- 【解压】执行
tar -zxf nexus-unix.tar.gz命令,会解压出两个目录:nexus-<version>- 程序目录。包含了 Nexus 运行所需要的文件。是 Nexus 运行必须的。nexus-<version>/etc- 配置目录。nexus-<version>/etc/nexus.properties- nexus 核心配置文件(默认 etc 目录下有nexus-default.properties,可以基于此修改)。
sonatype-work- 仓库目录。包含了 Nexus 生成的配置文件、日志文件、仓库文件等。当我们需要备份 Nexus 的时候默认备份此目录即可。
- [修改环境变量】执行
vim /etc/profile,在文件尾部添加以下内容:
NEXUS_HOME=/usr/program/nexus2.11.4
export NEXUS_HOME
刷新环境变量:source /etc/profile
- 【检查安装是否成功】执行
nexus -version查看是否安装成功。 - 【防火墙】
- iptabes
- 添加规则:
iptables -I INPUT -p tcp -m tcp --dport 8081 -j ACCEPT - 载入规则:
/etc/rc.d/init.d/iptables save - 重启 iptables:
service iptables restart
- 添加规则:
- firewalld
- 添加规则:
firewall-cmd --zone=public --add-port=8081/tcp --permanent - 载入规则:
firewall-cmd --reload
- 添加规则:
- iptabes
# 二、Nexus 使用
# 启动/停止 Nexus
进入 nexus-3.13.0-01/bin 目录,有一个可执行脚本 nexus。
执行 ./nexus,可以查看允许执行的参数,如下所示,含义可谓一目了然:
$ ./nexus
Usage: ./nexus {start|stop|run|run-redirect|status|restart|force-reload}
- 启动 nexus -
./nexus start - 停止 nexus -
./nexus stop - 重启 nexus -
./nexus restart
Nexus 的默认启动端口为 8081,启动成功后,在浏览器中访问 http://<ip>:8081,欢迎页面如下图所示:
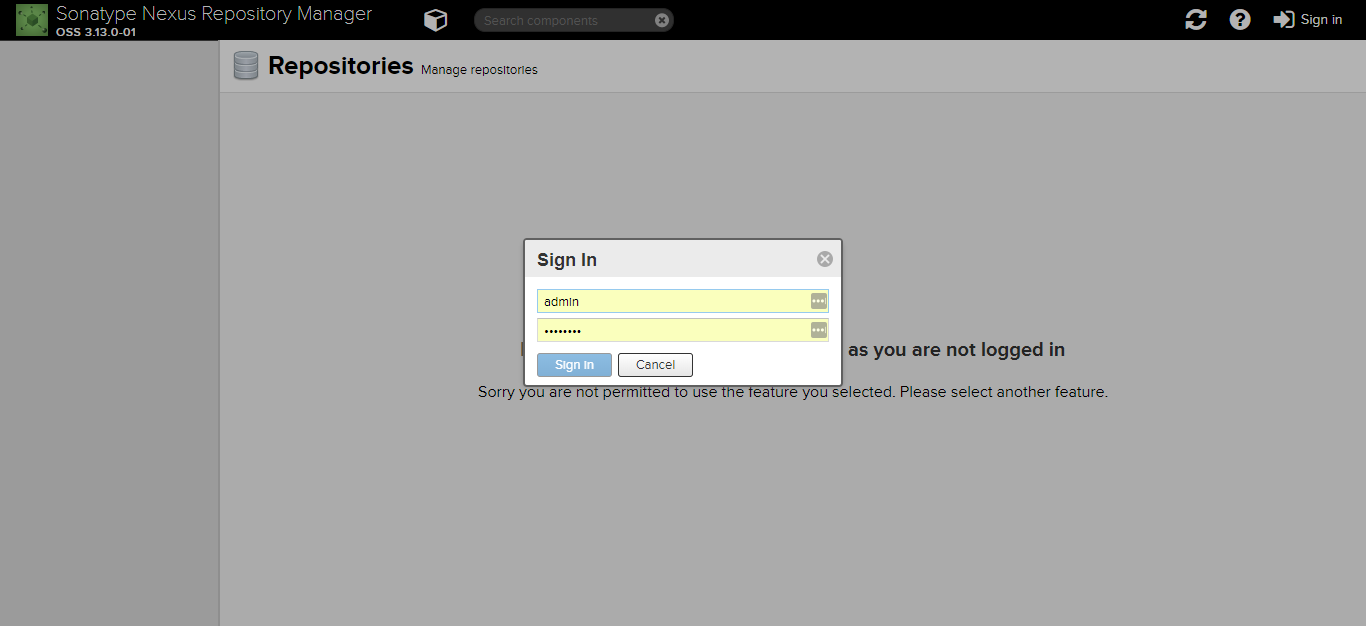
点击右上角 Sign in 登录,默认用户名/密码为:admin/admin123。
# 配置 maven 仓库
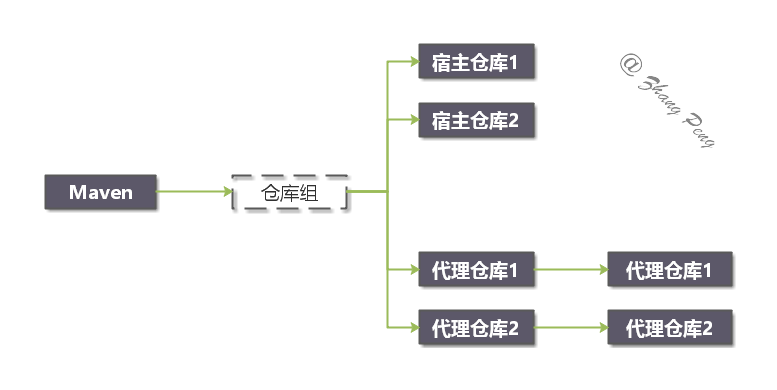
Nexus 中的仓库有以下类型:
hosted- 宿主仓库。主要用于部署无法从公共仓库获取的构件(如 oracle 的 JDBC 驱动)以及自己或第三方的项目构件;proxy- 代理仓库。代理公共的远程仓库;virtual- 虚拟仓库。用于适配 Maven 1;group- 仓库组。Nexus 通过仓库组的概念统一管理多个仓库,这样我们在项目中直接请求仓库组即可请求到仓库组管理的多个仓库。
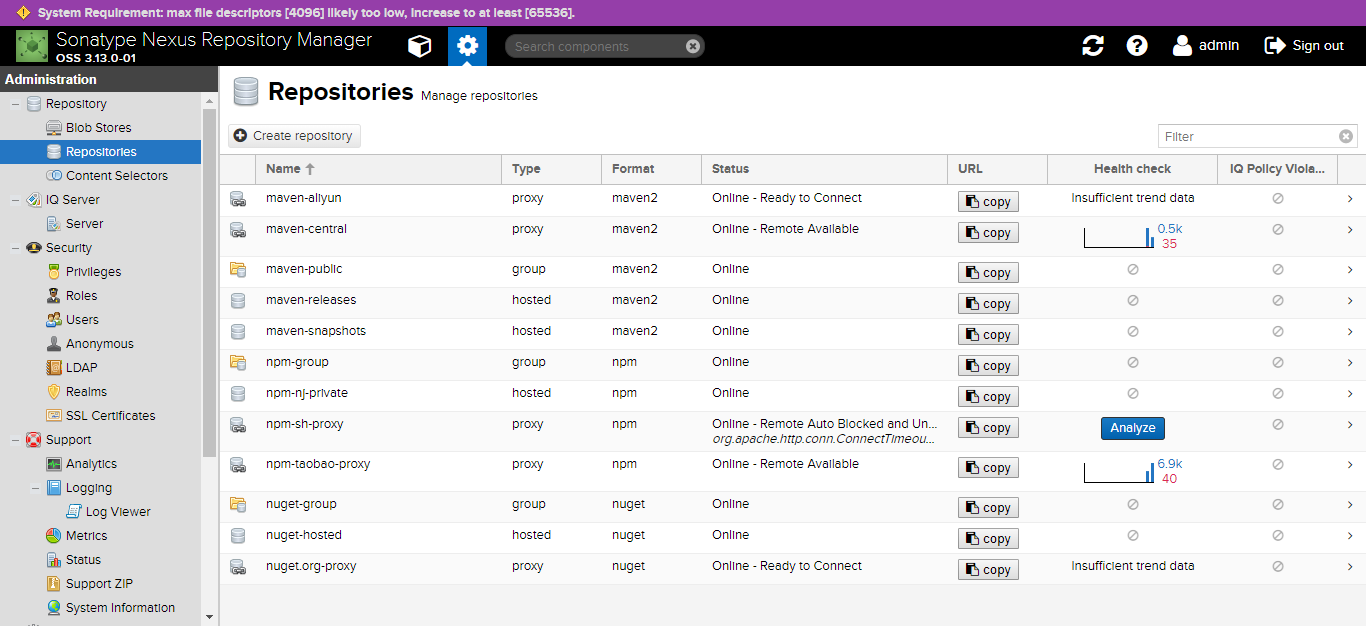
建议配置如下:
- hosted 仓库
- maven-releases - 存储私有仓库的发行版 jar 包
- maven-snapshots - 存储私有仓库的快照版(调试版本) jar 包
- proxy 仓库
- maven-central-maven - 中央库(如果没有配置 mirror,默认就从这里下载 jar 包),从 https://repo1.maven.org/maven2/ 获取资源
- maven-aliyun - 国内 maven 仓库,提高访问速度。
- group 仓库
- maven-public - 私有仓库的公共空间,把上面三个仓库组合在一起对外提供服务,在本地 maven 基础配置 settings.xml 中使用。
其中:
maven-central、maven-public、maven-release、maven-snapshot 仓库是默认配置好的 maven 仓库。maven-central 配置的是
https://repo1.maven.org/maven2/的代理仓库,即 maven 中央仓库地址。
参考配置如下:
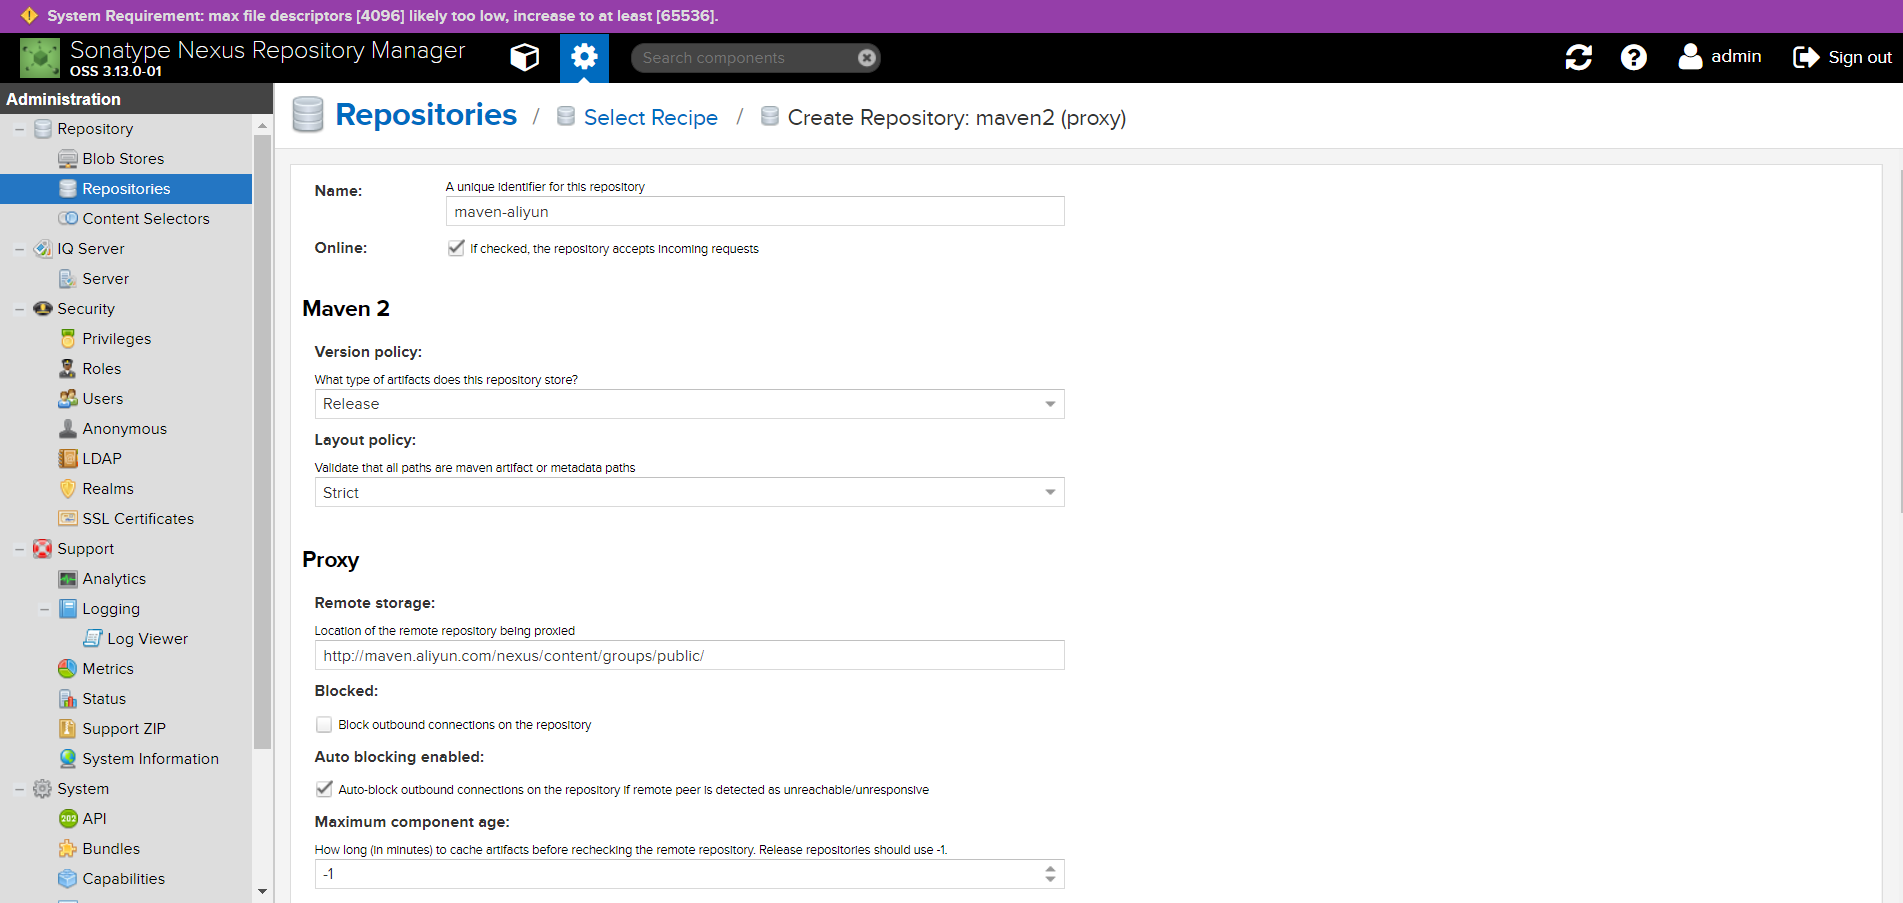
推荐配置的代理仓库:
- OSS SNAPSHOT 仓库:
http://oss.jfrog.org/artifactory/oss-snapshot-local/ - aliyun 仓库(受限于国内网络,可以通过它来加速):
http://maven.aliyun.com/nexus/content/groups/public/
# 配置 yum 仓库
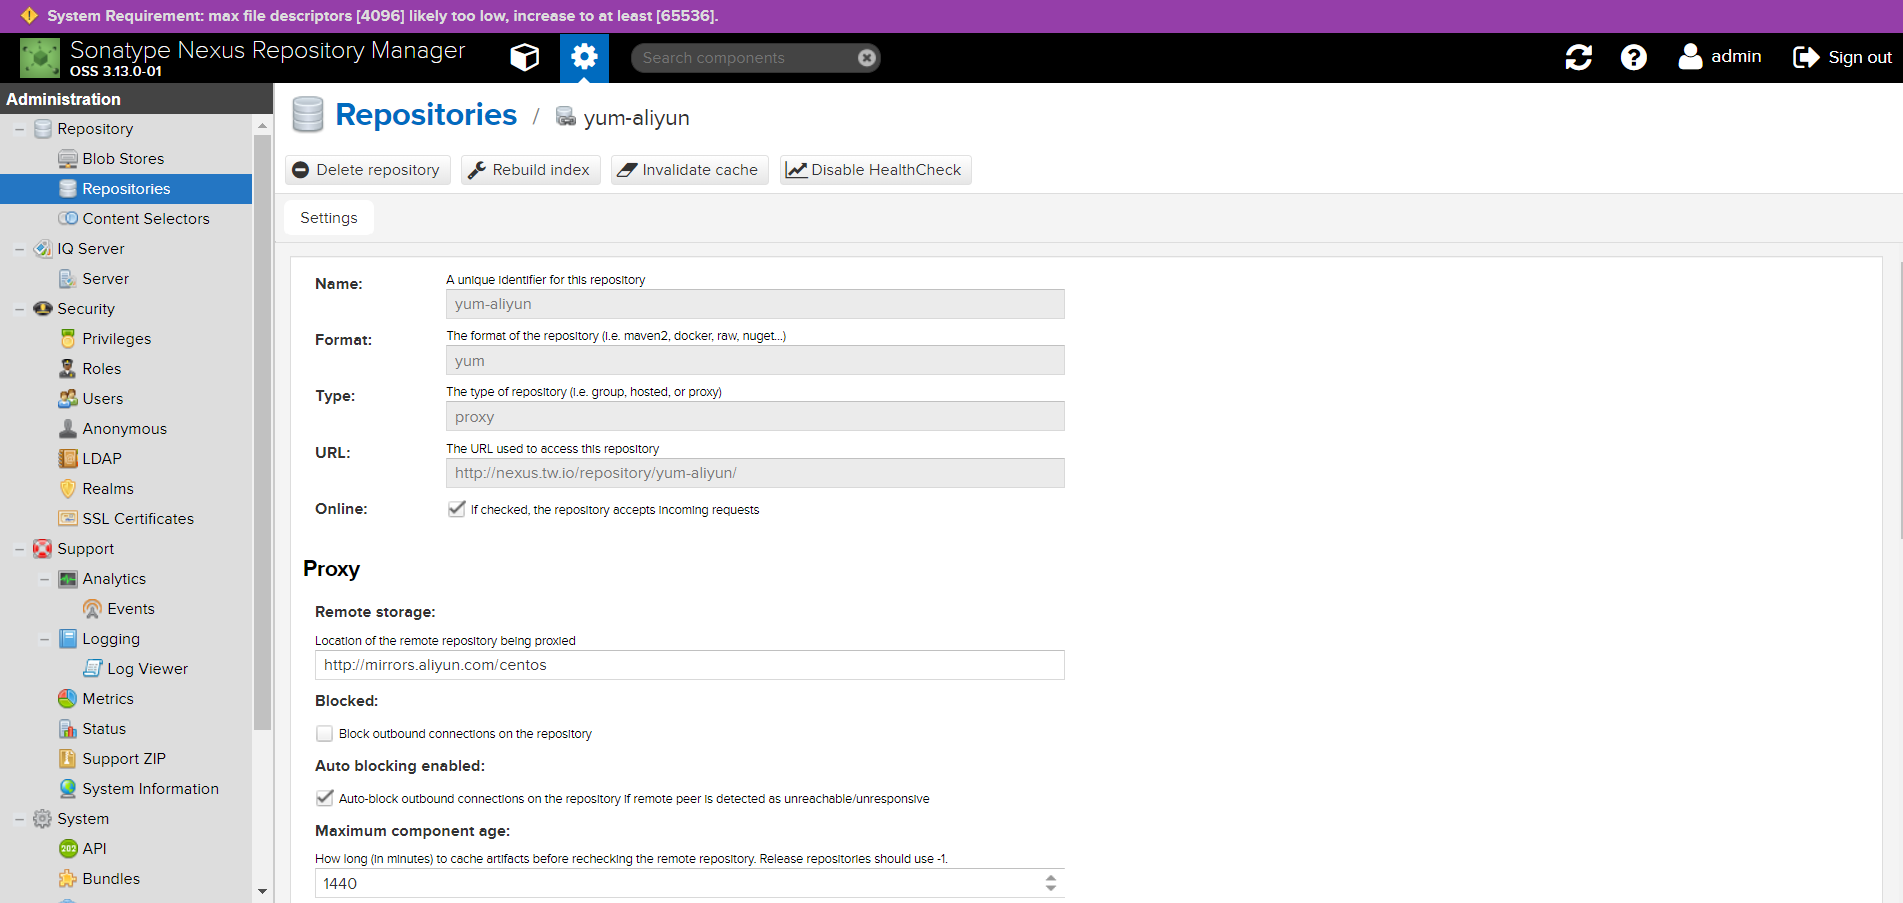
推荐配置的 yum 代理仓库:
- aliyun yum 仓库:
http://mirrors.aliyun.com/centos
配置本地 yum:
(1)新增 nexus.repo 文件,内容如下:
[base]
name=Nexus
baseurl= http://<nexus host>:<nexus port>/repository/yum-aliyun/$releasever/os/$basearch/
enabled=1
gpgcheck=0
priority=1
(2)更新 yum 缓存,执行以下命令:
yum clean all
yum makecache
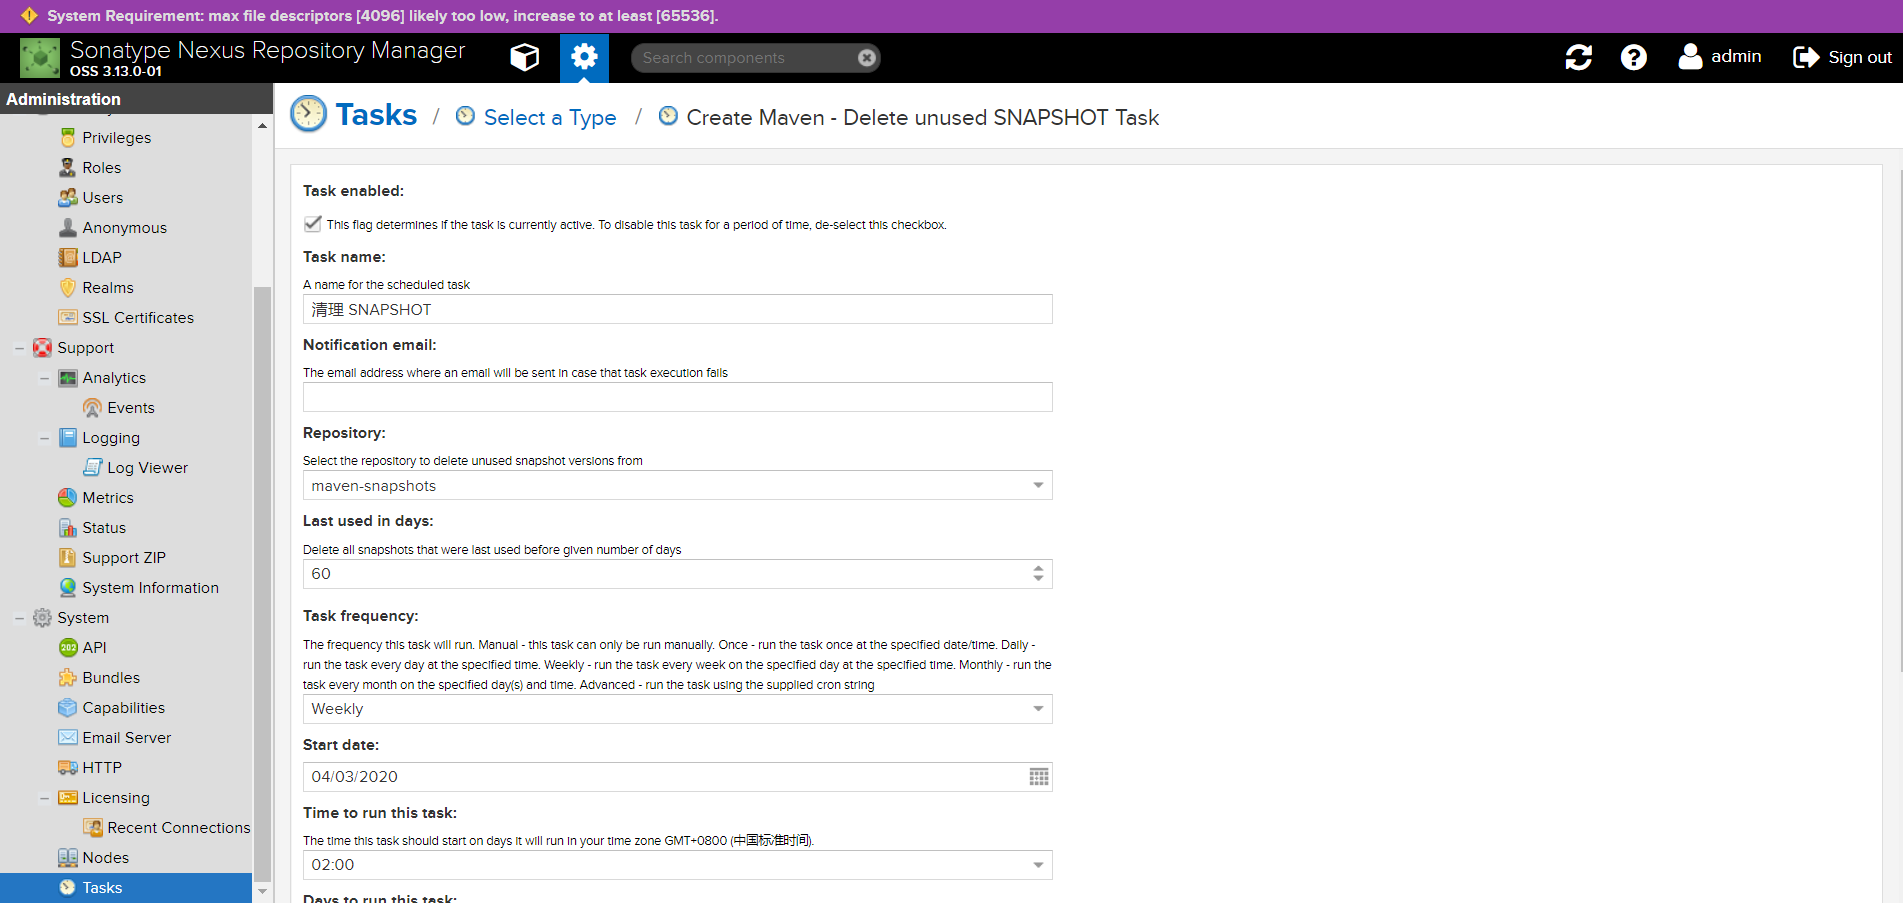
# 定时任务
随着 jar 包越来越多,尤其是 SNAPSHOT 包由于不限制重复上传,尤其容易导致磁盘空间膨胀。所以,需要定期进行清理或修复。
Nexus 内置了多个定时任务,可以执行清理。
【示例】定期清理 SNAPSHOST
# 三、开机自启动
作为常用服务,有必要将 Nexus 设为 systemd 服务,以便在断电恢复后自动重启。
配置方法如下:
在 /lib/systemd/system 目录下创建 nexus.service 文件,内容如下:
[Unit]
Description=nexus
After=network.target

[Service]
Type=forking
LimitNOFILE=65536 #警告处理
Environment=RUN_AS_USER=root
ExecStart=/opt/maven/nexus-3.13.0-01/bin/nexus start
ExecReload=/opt/maven/nexus-3.13.0-01/bin/nexus restart
ExecStop=/opt/maven/nexus-3.13.0-01/bin/nexus stop
Restart=on-failure
PrivateTmp=true

[Install]
WantedBy=multi-user.target
保存后,可以使用以下命令应用 nexus 服务:
systemctl enable nexus- 启动 nexus 开机启动systemctl disable nexus- 关闭 nexus 开机启动systemctl start nexus- 启动 nexus 服务systemctl stop nexus- 停止 nexus 服务systemctl restart nexus- 重启 nexus 服务
执行
systemctl enable nexus后,再执行 reboot 重启,重连后,可以检测是否成功开机自动重启。
# 四、Nexus 和 Maven
Nexus 是 maven 私服。现在,Nexus 服务器已经部署好了,如何配合 maven 使用呢?
# 配置 settings.xml
如果要使用 Nexus,还必须在 settings.xml 和 pom.xml 中配置认证信息。
一份完整的 settings.xml:
<?xml version="1.0" encoding="UTF-8"?>

<settings xmlns="http://maven.apache.org/SETTINGS/1.0.0"
  xmlns:xsi="http://www.w3.org/2001/XMLSchema-instance" xsi:schemaLocation="http://maven.apache.org/SETTINGS/1.0.0 http://maven.apache.org/xsd/settings-1.0.0.xsd">
  <pluginGroups>
    <pluginGroup>org.sonatype.plugins</pluginGroup>
  </pluginGroups>

  <!--设置本地 maven 仓库-->
  <localRepository>D:\Tools\maven\.m2</localRepository>

  <!--Maven 私服账号信息-->
  <servers>
    <server>
      <id>releases</id>
      <username>admin</username>
      <password>admin123</password>
    </server>
    <server>
      <id>snapshots</id>
      <username>admin</username>
      <password>admin123</password>
    </server>
  </servers>

  <!--Maven 镜像地址-->
  <mirrors>
    <mirror>
      <id>public</id>
      <mirrorOf>*</mirrorOf>
      <!--Nexus 服务器地址-->
      <url>http://10.255.255.224:8081/repository/maven-public/</url>
    </mirror>
  </mirrors>

  <profiles>
    <profile>
      <id>zp</id>
      <repositories>
        <repository>
          <id>central</id>
          <url>http://central</url>
          <releases>
            <enabled>true</enabled>
          </releases>
          <snapshots>
            <enabled>true</enabled>
          </snapshots>
        </repository>
      </repositories>
      <pluginRepositories>
        <pluginRepository>
          <id>central</id>
          <url>http://central</url>
          <releases>
            <enabled>true</enabled>
          </releases>
          <snapshots>
            <enabled>true</enabled>
            <updatePolicy>always</updatePolicy>
          </snapshots>
        </pluginRepository>
      </pluginRepositories>
    </profile>
  </profiles>

  <activeProfiles>
    <activeProfile>zp</activeProfile>
  </activeProfiles>
</settings>
# 配置 pom.xml
在 pom.xml 中添加如下配置,这样就可以执行 mvn deploy,将本地构建的 jar、war 等包发布到私服上。
  <distributionManagement>
    <repository>
      <id>releases</id>
      <name>Releases</name>
      <url>http://10.255.255.224:8081/repository/maven-releases</url>
    </repository>
    <snapshotRepository>
      <id>snapshots</id>
      <name>Snapshot</name>
      <url>http://10.255.255.224:8081/repository/maven-snapshots</url>
    </snapshotRepository>
  </distributionManagement>
🔔 注意:
<repository>和<snapshotRepository>的 id 必须和settings.xml配置文件中的<server>标签中的 id 匹配。<url>标签的地址需要和 maven 私服的地址匹配。
# 执行 maven 构建
如果要使用 settings.xml 中的私服配置,必须通过指定 -P zp 来激活 profile。
示例:
# 编译并打包 maven 项目
$ mvn clean package -Dmaven.skip.test=true -P zp

# 编译并上传 maven 交付件(jar 包)
$ mvn clean deploy -Dmaven.skip.test=true -P zp
至此,已经可以正常向 Nexus 上传、下载 jar 包。
# 五、备份和迁移
Nexus 三个重要目录:
| 名称 | 目录名 | 重要配置文件 |
|---|---|---|
| nexus 主目录 | nexus-2.6.4-02 | conf/nexus.properties 里面有 sonatype-work 的地址 |
| sonatype-work 目录 | sonatype-work | nexus/conf/nexus.xml 里面有 storage 的地址 |
| storage 目录 | storage | 里面主要是各种程序的 jar 包等 |
# 备份
Nexus 的数据都存储在 sonatype-work 目录,备份 Nexus 数据只需要将其打包即可。
# 迁移
将原 Nexus 服务器中的 sonatype-work 目录迁移到新 Nexus 服务器的 sonatype-work 目录下。
# 六、FAQ
# 配置 INSTALL4J_JAVA_HOME
我在工作中遇到 nexus systemctl 服务无法自启动的问题,通过查看状态,发现以下报错:
Please define INSTALL4J_JAVA_HOME to point to a suitable JVM
通过排查,找到原因:即使环境上已安装 JDK,且配置了 JAVA_HOME,但 nexus 仍然无法正确找到 JDK,需要在 /bin/nexus 中指定 INSTALL4J_JAVA_HOME_OVERRIDE=<JDK安装路径>